Category: Blog

  • codex.docs

    CodeX Docs

    CodeX Docs is a free docs application. It’s based on Editor.js ecosystem which gives all modern opportunities for working with content.

    You can use it for product documentation, for internal team docs, for personal notes or any other need.

    page-overview-bright

    It’s super easy to install and use.

    Features

    • 🤩 Editor.js ecosystem powered
    • 📂 Docs nesting — create any structure you need
    • 💎 Static rendering
    • 📱 Nice look on Desktop and Mobile
    • 🔥 Beautiful page URLs. Human-readable and SEO-friendly.
    • 🦅 Hawk is hunting. Errors tracking integrated
    • 💌 Misprints reports to the Telegram / Slack
    • 📈 Yandex Metrica integrated
    • 🚢 Deploy easily — no DB and other deps required
    • 🤙 Simple configuration
    • ⚙️ Tune UI as you need. Collapse sections, hide the Sidebar

    Demo

    Here is our Demo Application where you can try CodeX Docs in action.

    Guides

    1. Getting Started
    2. Configuration
    3. Kubernetes deployment
    4. Authentication
    5. Writing
    6. How to enable analytics
    7. Contribution guide

    Getting Started

    1. Clone the repo.

    git clone https://github.com/codex-team/codex.docs

    2. Fill the config

    Read about available configuration options.

    3. Run the application

    Using Yarn

    yarn && yarn start

    Using Docker

    docker-compose build
    docker-compose up
    

    Using Kubernetes

    We have the ready-to-use Helm chart to deploy project in Kubernetes

    Development

    See documentation for developers in DEVELOPMENT.md.

    About CodeX

    CodeX is a team of digital specialists around the world interested in building high-quality open source products on a global market. We are open for young people who want to constantly improve their skills and grow professionally with experiments in cutting-edge technologies.

    🌐 Join 👋 Twitter Instagram
    codex.so codex.so/join @codex_team @codex_team
    Visit original content creator repository https://github.com/codex-team/codex.docs
  • Snake

    The Snake

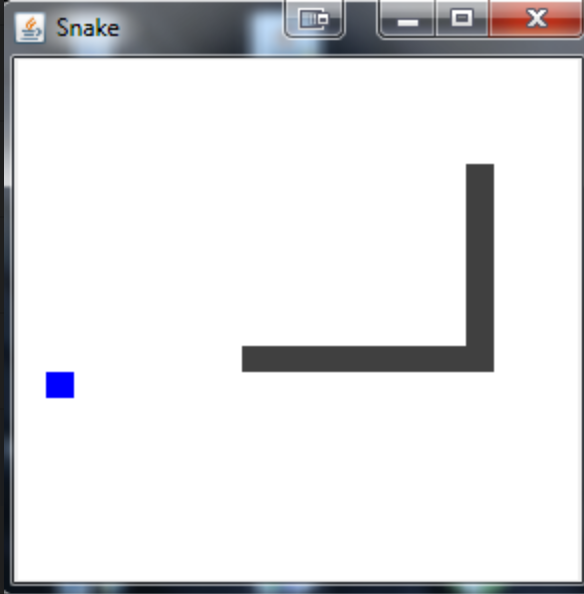
    A simple snake game in java . Using Threads and Java Swing to display the game. The code is well commented, if you have any questions or want to continue this project feel free to do so 👌

    How it looks:

    alt tag

    How you can support me:

    Buy Me A Coffee

    How to run the project:

    Requirements:

    • Java runtime installed
    • Alternatively: Docker

    How to play the game:

    • Just download the SnakeGame.jar file
    • Run it
    • Start playing with the arrows keys
    • If you lose, just close it and re-open it (I will add a restart button possibly)

    How to run on Mac OSX with Docker:

    • Install Xquartz
    • Launch XQuartz. Under the XQuartz menu, select Preferences
    • Go to the security tab and ensure “Allow connections from network clients” is checked.
    • In XQuartz terminal: Run xhost + ${hostname} to allow connections to the macOS host *
    • run sudo docker-compose up --build

    Troubleshooting (No X11 DISPLAY variable was set):

    • If on linux make sure you don’t have a headless version of Java installed
    • Otherwise check to make sure display environment variable is set
    export DISPLAY=:0.0
    

    Mentions

    Blog Posts:

    Academia:

    Visit original content creator repository https://github.com/hexadeciman/Snake
  • KeyVaultScannerUtility

    Introduction

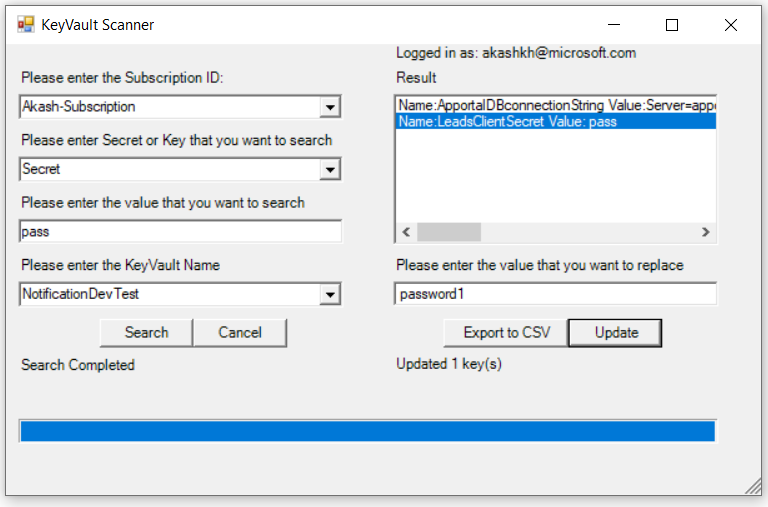
    This Utility can search any specified Key/Secret in all KeyVault present in your subscription. The search result than can be exported to an excel file and you can also update the secret directly from the Utility UI.

    • Light weight : PowerShell based utility.
    • Secure : Runs on user context and doesn’t collect any telemetry or logs.

    image.png

    Prerequisite

    • Requires Powershell Core or Powershell 7 and above

      Install Powershell core 7.0

    • Start Windows PowerShell with the “Run as administrator” option and Set Execution Policy

       PM> Set-ExecutionPolicy -ExecutionPolicy Unrestricted -Scope CurrentUser
       PM> Set-ExecutionPolicy -ExecutionPolicy Unrestricted -Scope LocalMachine
       
    
    • If Az Module is not already Installed, Install by running below command on Powershell core
       PM> Install-Module -Name Az -Force
    
    • If Az.Keyvault Module is not already Installed, Install by running below command on Powershell core
       PM> Install-Module -Name Az.keyvault -Force -AllowClobber
    

    Steps

    • Click on Run.vbs to launch the application

    • Login to Azure from the screen.

    • Once logged in enter Subscription ID, Secret/Key, Value to be searched & Keyvault Name and click Search

    • Utility will start searching secret/key in the KeyVault and Result be displayed in the Result Box as shown

    • Result can be Exported to CSV file and file will be saved on Desktop with the name scanresult.csv

    • You can select what all keys in the result that needs to be updated with new value and pass the value to the textbox and click update )

    Contributing

    This project welcomes contributions and suggestions. Most contributions require you to agree to a Contributor License Agreement (CLA) declaring that you have the right to, and actually do, grant us the rights to use your contribution. For details, visit https://cla.opensource.microsoft.com.

    When you submit a pull request, a CLA bot will automatically determine whether you need to provide a CLA and decorate the PR appropriately (e.g., status check, comment). Simply follow the instructions provided by the bot. You will only need to do this once across all repos using our CLA.

    This project has adopted the Microsoft Open Source Code of Conduct. For more information see the Code of Conduct FAQ or contact opencode@microsoft.com with any additional questions or comments.

    Trademarks

    This project may contain trademarks or logos for projects, products, or services. Authorized use of Microsoft trademarks or logos is subject to and must follow Microsoft’s Trademark & Brand Guidelines. Use of Microsoft trademarks or logos in modified versions of this project must not cause confusion or imply Microsoft sponsorship. Any use of third-party trademarks or logos are subject to those third-party’s policies.

    Visit original content creator repository https://github.com/microsoft/KeyVaultScannerUtility
  • InfiniteVoxelCaveWorld

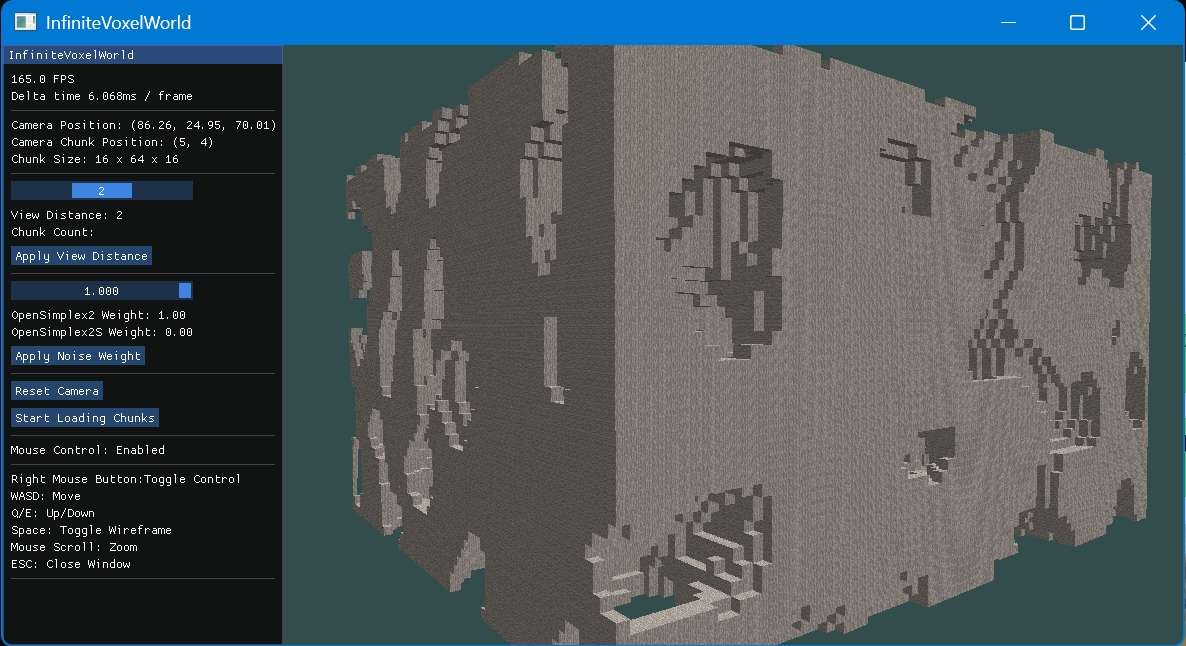
    Procedural Generation of Infinite Voxel Cave Terrain

    程序化生成体素洞穴地形

    Introduce 简介

    This is a Windows-based project for procedurally generating voxel caves. It primarily implements chunk-based data structures, uses noise functions as thresholds for cave and terrain generation, employs OpenGL to render voxel terrain, optimizes performance with voxel face culling and frustum culling, and utilizes multithreading to separate rendering from generation logic, enabling the creation of an infinite voxel cave terrain.

    这是一个Windows平台的程序化生成体素洞穴工程, 主要实现了以区块为数据结构, 以噪声为洞穴和地形的生成阈值, 使用OpenGL渲染体素地形, 使用体素相邻面剔除和视锥体剔除技术优化性能, 使用多线程将渲染与生成逻辑分离, 实现生成无限大的体素洞穴地形的程序

    Features 特性

    • Voxel Chunk Data Structure: Uses chunks as the basic data structure for managing and rendering the scene.

    • Noise-based Cave and Terrain Generation: Defines generation thresholds for caves and terrain using noise functions to simulate natural landscapes.

    • OpenGL Rendering: Renders voxel terrain using OpenGL technology.

    • Performance Optimization:

      • Voxel Face Culling: Renders only visible voxel faces, reducing unnecessary rendering load.
      • Frustum Culling: Renders only the chunks within the view frustum, improving rendering performance.
      • Multithreading: Separates rendering and generation logic, enabling parallel processing of generation and rendering.
    • 体素区块数据结构: 使用区块作为基础数据结构,实现场景的管理和渲染。

    • 噪声生成洞穴和地形: 利用噪声函数定义洞穴和地形的生成阈值,模拟自然地形。

    • OpenGL渲染: 使用OpenGL技术实现体素地形渲染。

    • 性能优化:

      • 体素相邻面剔除: 仅渲染可见的体素面,减少不必要的渲染开销。
      • 视锥体剔除: 仅渲染在视野范围内的区块,提高渲染性能。
      • 多线程处理: 渲染与生成逻辑分离,实现生成和渲染的并行处理。

    Installation and Usage 安装与使用

    System Requirements 系统需求

    • Windows
    • OpenGL3.0+
    • Visual Studio 2022

    Installation Steps 安装步骤

    Simply clone the repository and double-click the .sln file to open it with Visual Studio.

    直接克隆仓库并双击sln使用VisualStudio打开即可

    Screenshot 示例截图

    cave_overview

    Key Features Implementation Summary 重点功能实现总结

    1. 噪声地形区块生成

    用三维布尔类型的数组储存体素是否被填充:

    chunkBlocks = vector<vector<vector<bool>>>(size, vector<vector<bool>>(chunkHeight, vector<bool>(size, false)));

    通过噪声值计算地形的高度, 留出地形最小高度

    int terrainHeight = chunkHeight - 4 + static_cast<int>((noiseValue + 1.0f) * 0.5f * 4);// 这里的4是地形的最小高度

    通过噪声值判断地表下方一定高度y之下是否为洞穴:

    if (caveNoise < THRESHOLD) {
      chunkBlocks[x][y][z] = true;
      voxelPositions.push_back(glm::vec3(x, y, z));
    }

    2. 体素相邻面剔除

    通过获遍历数组每一个体素, 通过它六个方向的相邻体素的bool值判断相邻位置是否有体素, 如果没有体素, 则将此面的顶点添加进可以见面顶点数组中

    if (!isVoxelAt(x + 1, y, z)) {
      visibleFaces.emplace_back(voxelPosition, Face::RIGHT_FACE);
      for (int i = 24; i < 30; ++i) {
        chunkVisibleFacesVertices.push_back({ voxelVertices[i].position + voxelPosition, voxelVertices[i].texCoords });
      }
    }

    3. 渲染与地形生成的多线程实现

    原子

    std::atomic<bool> updateChunks(true);

    单独用一个线程来控制区块更新

    static void updateChunksThread(ChunkManager& chunkManager, std::atomic<bool>& running) {
    	while (running)
    	{
    		chunkManager.update(camera.Position);
    		std::this_thread::sleep_for(std::chrono::milliseconds(10));
    	}
    }

    创建线程:

    std::thread chunkUpdateThread(updateChunksThread, std::ref(chunkManager), std::ref(updateChunks));

    在 ChunkManager 类中使用Mutex锁来控制可能冲突的资源

    std::mutex chunksMutex; // Mutex lock

    在需要对 chunks 进行修改时, 需要先lock

    std::lock_guard<std::mutex> lock(chunksMutex);

    4. 视锥体剔除

    用 vec4 plane[6] 表示视锥体的6个面, 每个面的方程式为ax + by + cz + d = 0, 其中 a, b, c, d 在 vec4 中的位置是 (a, b, c, d)

    planes[0] = glm::vec4(
        projectionViewMatrix[0][3] + projectionViewMatrix[0][0], // Left
        projectionViewMatrix[1][3] + projectionViewMatrix[1][0],
        projectionViewMatrix[2][3] + projectionViewMatrix[2][0],
        projectionViewMatrix[3][3] + projectionViewMatrix[3][0]);
    

    传入的参数为区块的两个边界顶点坐标 max, min 分别是坐标 x y z 的最大值点和最小值点

    通过方法 isAABBInFrustum , 以法向量(vec4:plane[i]的前三个元素构成的vec3)的x y z 正负判断, 如果 plane[i].x 为正, 则选择体素顶点中x最大的值: max.x, 以此类推, 得到最后结果点 P

    通过法向量与 P 点的点成, 计算距离, w 是视锥体的各个平面的偏移量 如果结果小于0 , 则说明这个点在平面外, 返回 false , 如果所有平面都检查通过, 则返回 true

    bool isAABBInFrustum(const glm::vec3& min, const glm::vec3& max) const {
            for (int i = 0; i < 6; i++) {
                glm::vec3 p = min;
                if (planes[i].x >= 0) p.x = max.x;
                if (planes[i].y >= 0) p.y = max.y;
                if (planes[i].z >= 0) p.z = max.z;
                if (glm::dot(glm::vec3(planes[i]), p) + planes[i].w < 0) {
                    return false;
                }
            }
            return true;
        }

    5. 区块打包VAO/VBO

    VAO是顶点数组对象, VBO是顶点缓冲对象, 这里将一个区块的所有顶点绑定到一个VBO上

    glBindBuffer(GL_ARRAY_BUFFER, VBO);
    glBufferData(GL_ARRAY_BUFFER, vertices.size() * sizeof(Vertex), vertices.data(), GL_STATIC_DRAW);

    Contact Information 联系方式

    Visit original content creator repository https://github.com/WangSimiao2000/InfiniteVoxelCaveWorld
  • okta-spring-boot-2-angular-7-example

    Basic CRUD App with Angular 7.0 and Spring Boot 2.1

    This example app shows how to build a basic CRUD app with Spring Boot 2.1, Spring Data, and Angular 7.0.

    Please read Build a Basic CRUD App with Angular 7.0 and Spring Boot 2.1 to see how this app was created.

    Prerequisites: Java 8 and Node.js. For Java 10+, you’ll need to change the java.version property and jaxb-api as a dependency. See Josh Long’s spring-boot-and-java-10 project on GitHub for more information.

    Okta has Authentication and User Management APIs that reduce development time with instant-on, scalable user infrastructure. Okta’s intuitive API and expert support make it easy for developers to authenticate, manage and secure users and roles in any application.

    Getting Started

    To install this example application, run the following commands:

    git clone https://github.com/oktadeveloper/okta-spring-boot-2-angular-7-example.git
    cd okta-spring-boot-2-angular-7-example

    This will get a copy of the project installed locally. To install all of its dependencies and start each app, follow the instructions below.

    To run the server, cd into the server folder and run:

    ./mvnw spring-boot:run

    To run the client, cd into the client folder and run:

    npm install && npm start

    Create a New OIDC App in Okta

    To create a new OIDC app on Okta:

    1. Log in to your developer account, navigate to Applications, and click on Add Application.
    2. Select Single-Page App and click Next.
    3. Give the application a name, change all instances of localhost:8080 to localhost:4200 and click Done.

    Server Configuration

    Set your domain and copy the clientId into server/src/main/resources/application.yml.

    NOTE: The value of {yourOktaDomain} should be something like dev-123456.oktapreview. Make sure you don’t include -admin in the value!

    okta:
      oauth2:
        client-id: {clientId}
        issuer: https://{yourOktaDomain}/oauth2/default

    Client Configuration

    For the client, set the issuer and copy the clientId into client/src/app/app.module.ts.

    const config = {
      issuer: 'https://{yourOktaDomain}/oauth2/default',
      redirectUri: window.location.origin + '/implicit/callback',
      clientId: '{clientId}'
    };

    Links

    This example uses the following open source libraries from Okta:

    Help

    Please post any questions as comments on the blog post, or visit our Okta Developer Forums. You can also email developers@okta.com if would like to create a support ticket.

    License

    Apache 2.0, see LICENSE.

    Visit original content creator repository
    https://github.com/oktadev/okta-spring-boot-2-angular-7-example

  • .github

    logo

    IzanagiCraft – Code of Conduct

    Support

    Our Pledge

    We as members, contributors, and leaders pledge to make participation in our community a harassment-free experience for everyone, regardless of age, body size, visible or invisible disability, ethnicity, sex characteristics, gender identity and expression, level of experience, education, socio-economic status, nationality, personal appearance, race, religion, or sexual identity and orientation.

    We pledge to act and interact in ways that contribute to an open, welcoming, diverse, inclusive, and healthy community.


    Our Standards

    Examples of behavior that contributes to a positive environment for our community include:

    • Demonstrating empathy and kindness toward other people
    • Being respectful of differing opinions, viewpoints, and experiences
    • Giving and gracefully accepting constructive feedback
    • Accepting responsibility and apologizing to those affected by our mistakes, and learning from the experience
    • Focusing on what is best not just for us as individuals, but for the overall community

    Examples of unacceptable behavior include:

    • The use of sexualized language or imagery, and sexual attention or advances of any kind
    • Trolling, insulting or derogatory comments, and personal or political attacks
    • Public or private harassment
    • Publishing others’ private information, such as a physical or email address, without their explicit permission
    • Contacting individual members, contributors, or leaders privately, outside designated community mechanisms, without their explicit permission
    • Other conduct which could reasonably be considered inappropriate in a professional setting

    Enforcement Responsibilities

    Community leaders are responsible for clarifying and enforcing our standards of acceptable behavior and will take appropriate and fair corrective action in response to any behavior that they deem inappropriate, threatening, offensive, or harmful.

    Community leaders have the right and responsibility to remove, edit, or reject comments, commits, code, wiki edits, issues, and other contributions that are not aligned to this Code of Conduct, and will communicate reasons for moderation decisions when appropriate.

    Scope

    This Code of Conduct applies within all community spaces, and also applies when an individual is officially representing the community in public spaces. Examples of representing our community include using an official e-mail address, posting via an official social media account, or acting as an appointed representative at an online or offline event.


    Enforcement

    Instances of abusive, harassing, or otherwise unacceptable behavior may be reported to the community leaders responsible for enforcement at github@izanagicraft.com. All complaints will be reviewed and investigated promptly and fairly.

    All community leaders are obligated to respect the privacy and security of the reporter of any incident.

    Enforcement Guidelines

    Community leaders will follow these Community Impact Guidelines in determining the consequences for any action they deem in violation of this Code of Conduct:

    1. Correction

    Community Impact: Use of inappropriate language or other behavior deemed unprofessional or unwelcome in the community.

    Consequence: A private, written warning from community leaders, providing clarity around the nature of the violation and an explanation of why the behavior was inappropriate. A public apology may be requested.

    2. Warning

    Community Impact: A violation through a single incident or series of actions.

    Consequence: A warning with consequences for continued behavior. No interaction with the people involved, including unsolicited interaction with those enforcing the Code of Conduct, for a specified period of time. This includes avoiding interactions in community spaces as well as external channels like social media. Violating these terms may lead to a temporary or permanent ban.

    3. Temporary Ban

    Community Impact: A serious violation of community standards, including sustained inappropriate behavior.

    Consequence: A temporary ban from any sort of interaction or public communication with the community for a specified period of time. No public or private interaction with the people involved, including unsolicited interaction with those enforcing the Code of Conduct, is allowed during this period. Violating these terms may lead to a permanent ban.

    4. Permanent Ban

    Community Impact: Demonstrating a pattern of violation of community standards, including sustained inappropriate behavior, harassment of an individual, or aggression toward or disparagement of classes of individuals.

    Consequence: A permanent ban from any sort of public interaction within the community.


    Attribution

    This Code of Conduct is adapted from the Contributor Covenant, version 2.0.

    Community Impact Guidelines were inspired by Mozilla’s code of conduct enforcement ladder.

    For answers to common questions about this code of conduct, see the FAQ at https://www.contributor-covenant.org/faq. Translations are available at https://www.contributor-covenant.org/translations.

    Visit original content creator repository https://github.com/IzanagiCraft/.github
  • robotstxt

    robotstxt

    Crates.io Docs.rs Apache 2.0

    A native Rust port of Google’s robots.txt parser and matcher C++ library.

    • Native Rust port, no third-part crate dependency
    • Zero unsafe code
    • Preserves all behavior of original library
    • Consistent API with the original library
    • 100% google original test passed

    Installation

    [dependencies]
    robotstxt = "0.3.0"

    Quick start

    use robotstxt::DefaultMatcher;
    
    let mut matcher = DefaultMatcher::default();
    let robots_body = "user-agent: FooBot\n\
                       disallow: /\n";
    assert_eq!(false, matcher.one_agent_allowed_by_robots(robots_body, "FooBot", "https://foo.com/"));

    About

    Quoting the README from Google’s robots.txt parser and matcher repo:

    The Robots Exclusion Protocol (REP) is a standard that enables website owners to control which URLs may be accessed by automated clients (i.e. crawlers) through a simple text file with a specific syntax. It’s one of the basic building blocks of the internet as we know it and what allows search engines to operate.

    Because the REP was only a de-facto standard for the past 25 years, different implementers implement parsing of robots.txt slightly differently, leading to confusion. This project aims to fix that by releasing the parser that Google uses.

    The library is slightly modified (i.e. some internal headers and equivalent symbols) production code used by Googlebot, Google’s crawler, to determine which URLs it may access based on rules provided by webmasters in robots.txt files. The library is released open-source to help developers build tools that better reflect Google’s robots.txt parsing and matching.

    Crate robotstxt aims to be a faithful conversion, from C++ to Rust, of Google’s robots.txt parser and matcher.

    Testing

    $ git clone https://github.com/Folyd/robotstxt
    Cloning into 'robotstxt'...
    $ cd robotstxt/tests 
    ...
    $ mkdir c-build && cd c-build
    ...
    $ cmake ..
    ...
    $ make
    ...
    $ make test
    Running tests...
    Test project ~/robotstxt/tests/c-build
        Start 1: robots-test
    1/1 Test #1: robots-test ......................   Passed    0.33 sec
    

    License

    The robotstxt parser and matcher Rust library is licensed under the terms of the Apache license. See LICENSE for more information.

    Visit original content creator repository https://github.com/Folyd/robotstxt
  • kuzzle-plugin-sequence

    Kuzzle Plugin S3

    This plugin exposes actions to upload files to Amazon S3 using Presigned URLs.

    Usage

    Get a Presigned URL:

    // Kuzzle request
    {
      "controller": "s3/upload",
      "action": "getUrl",
      "filename": "headcrab.png",
      "uploadDir": "xen"
    }
    
    // Kuzzle response
    {
      "fileKey": "xen/<uuid>-headcrab.png",
      "uploadUrl": "https://s3.eu-west-3.amazonaws.com/...",
      "fileUrl": "https://s3.eu-west-3.amazonaws.com/...",
      "ttl": 1200000
    }

    Then send a PUT request to the uploadUrl URL with the body set to the file’s content and a Content-Type header corresponding to the file mime type.

    Finally, validate the uploaded file. If not validated in a timely manner (the TTL is configurable), the uploaded file is automatically removed.

    // Kuzzle request
    {
      "controller": "s3/upload",
      "action": "validate",
      "fileKey": "xen/<uuid>-headcrab.png"
    }

    Example using the Javascript SDK

      // Get a Presigned URL
      const file = document.getElementById('uploadInput').files[0];
      const { result } = await kuzzle.query({
        controller: 's3/upload',
        action: 'getUrl',
        uploadDir: 'xen',
        filename: file.name
      });
    
      // Upload the file directly to S3
      const axiosOptions = {
        headers: {
          'Content-Type': file.type
        }
      };
      await axios.put(result.uploadUrl, file, axiosOptions);
    
      // Validate the uploaded file
      await kuzzle.query({
        controller: 's3/upload',
        action: 'validate',
        fileKey: result.fileKey
      });

    You can see a full example here: test/s3-test.html

    API

    upload:getUrl

    Returns a Presigned URL to upload directly to S3.
    The URL is only valid for a specified period of time. (Configurable in the kuzzlerc file)

    File uploaded to the generated URL must be validated with upload:validate otherwise they will be deleted after the same TTL as for the URL expiration.

    Request format:

    {
      // Kuzzle API params
      "controller": "s3/upload",
      "action": "getUrl",
    
      // Uploaded file name
      "filename": "headcrab.png", 
      // Upload directory
      "uploadDir": "xen" 
    }

    Response result format:

    {
      // File key in S3 bucket
      "fileKey": "xen/<uuid>-headcrab.png", 
      // Presigned upload URL
      "uploadUrl": "https://s3.eu-west-3.amazonaws.com/...", 
      // Public file URL after successful upload
      "fileUrl": "https://s3.eu-west-3.amazonaws.com/...", 
      // TTL in ms for the URL validity and before the uploaded file deletion
      "ttl": 1200000 
    }

    upload:validate

    Validate and persist a previsously uploaded file.
    Without a call to the action, every file uploaded on a Presigned URL will be deleted after a TTL.

    Request format:

    {
      // Kuzzle API params
      "controller": "s3/upload",
      "action": "validate",
    
      // File key in S3 bucket
      "fileKey": "xen/<uuid>-headcrab.png" 
    }

    Response result format:

    {
      // File key in S3 bucket
      "fileKey": "xen/<uuid>-headcrab.png", 
      // Public file URL after successful upload
      "fileUrl": "https://s3.eu-west-3.amazonaws.com/..." 
    }

    file:getUrl

    Returns the public file URL.

    Request format:

    {
      // Kuzzle API params
      "controller": "s3/file",
      "action": "getUrl",
    
      // File key in S3 bucket
      "fileKey": "xen/<uuid>-headcrab.png" 
    }

    Response result format:

    {
      // Public file URL after successful upload
      "fileUrl": "https://s3.eu-west-3.amazonaws.com/..." 
    }

    file:delete

    Deletes an uploaded file from S3.

    Request format:

    {
      // Kuzzle API params
      "controller": "s3/file",
      "action": "delete",
    
      "fileKey": "xen/<uuid>-headcrab.png" // File key in S3 bucket
    }

    Configuration

    You need to set your AWS access key in the environment: AWS_ACCESS_KEY_ID and AWS_SECRET_ACCESS_KEY.
    Your access key must have the following rights: PutObject and DeleteObject.

    Then in your kuzzlerc file, you can change the following configuration variable:

    {
      "plugins": {
        "s3": {
          // AWS S3 bucket
          "bucketName": "your-s3-bucket",
          // AWS S3 region
          "region": "eu-west-3",
          // TTL in ms before Presigned URL expire or the uploaded file is deleted
          "signedUrlTTL": 1200000,
          // Redis key prefix
          "redisPrefix": "s3Plugin/uploads"
        }
      }
    }

    AWS S3 Bucket

    First you must configure your bucket to allow public access to uploaded files.
    Go to the Permissions tab in your bucket configuration and in Bucket Policy add the following statement:
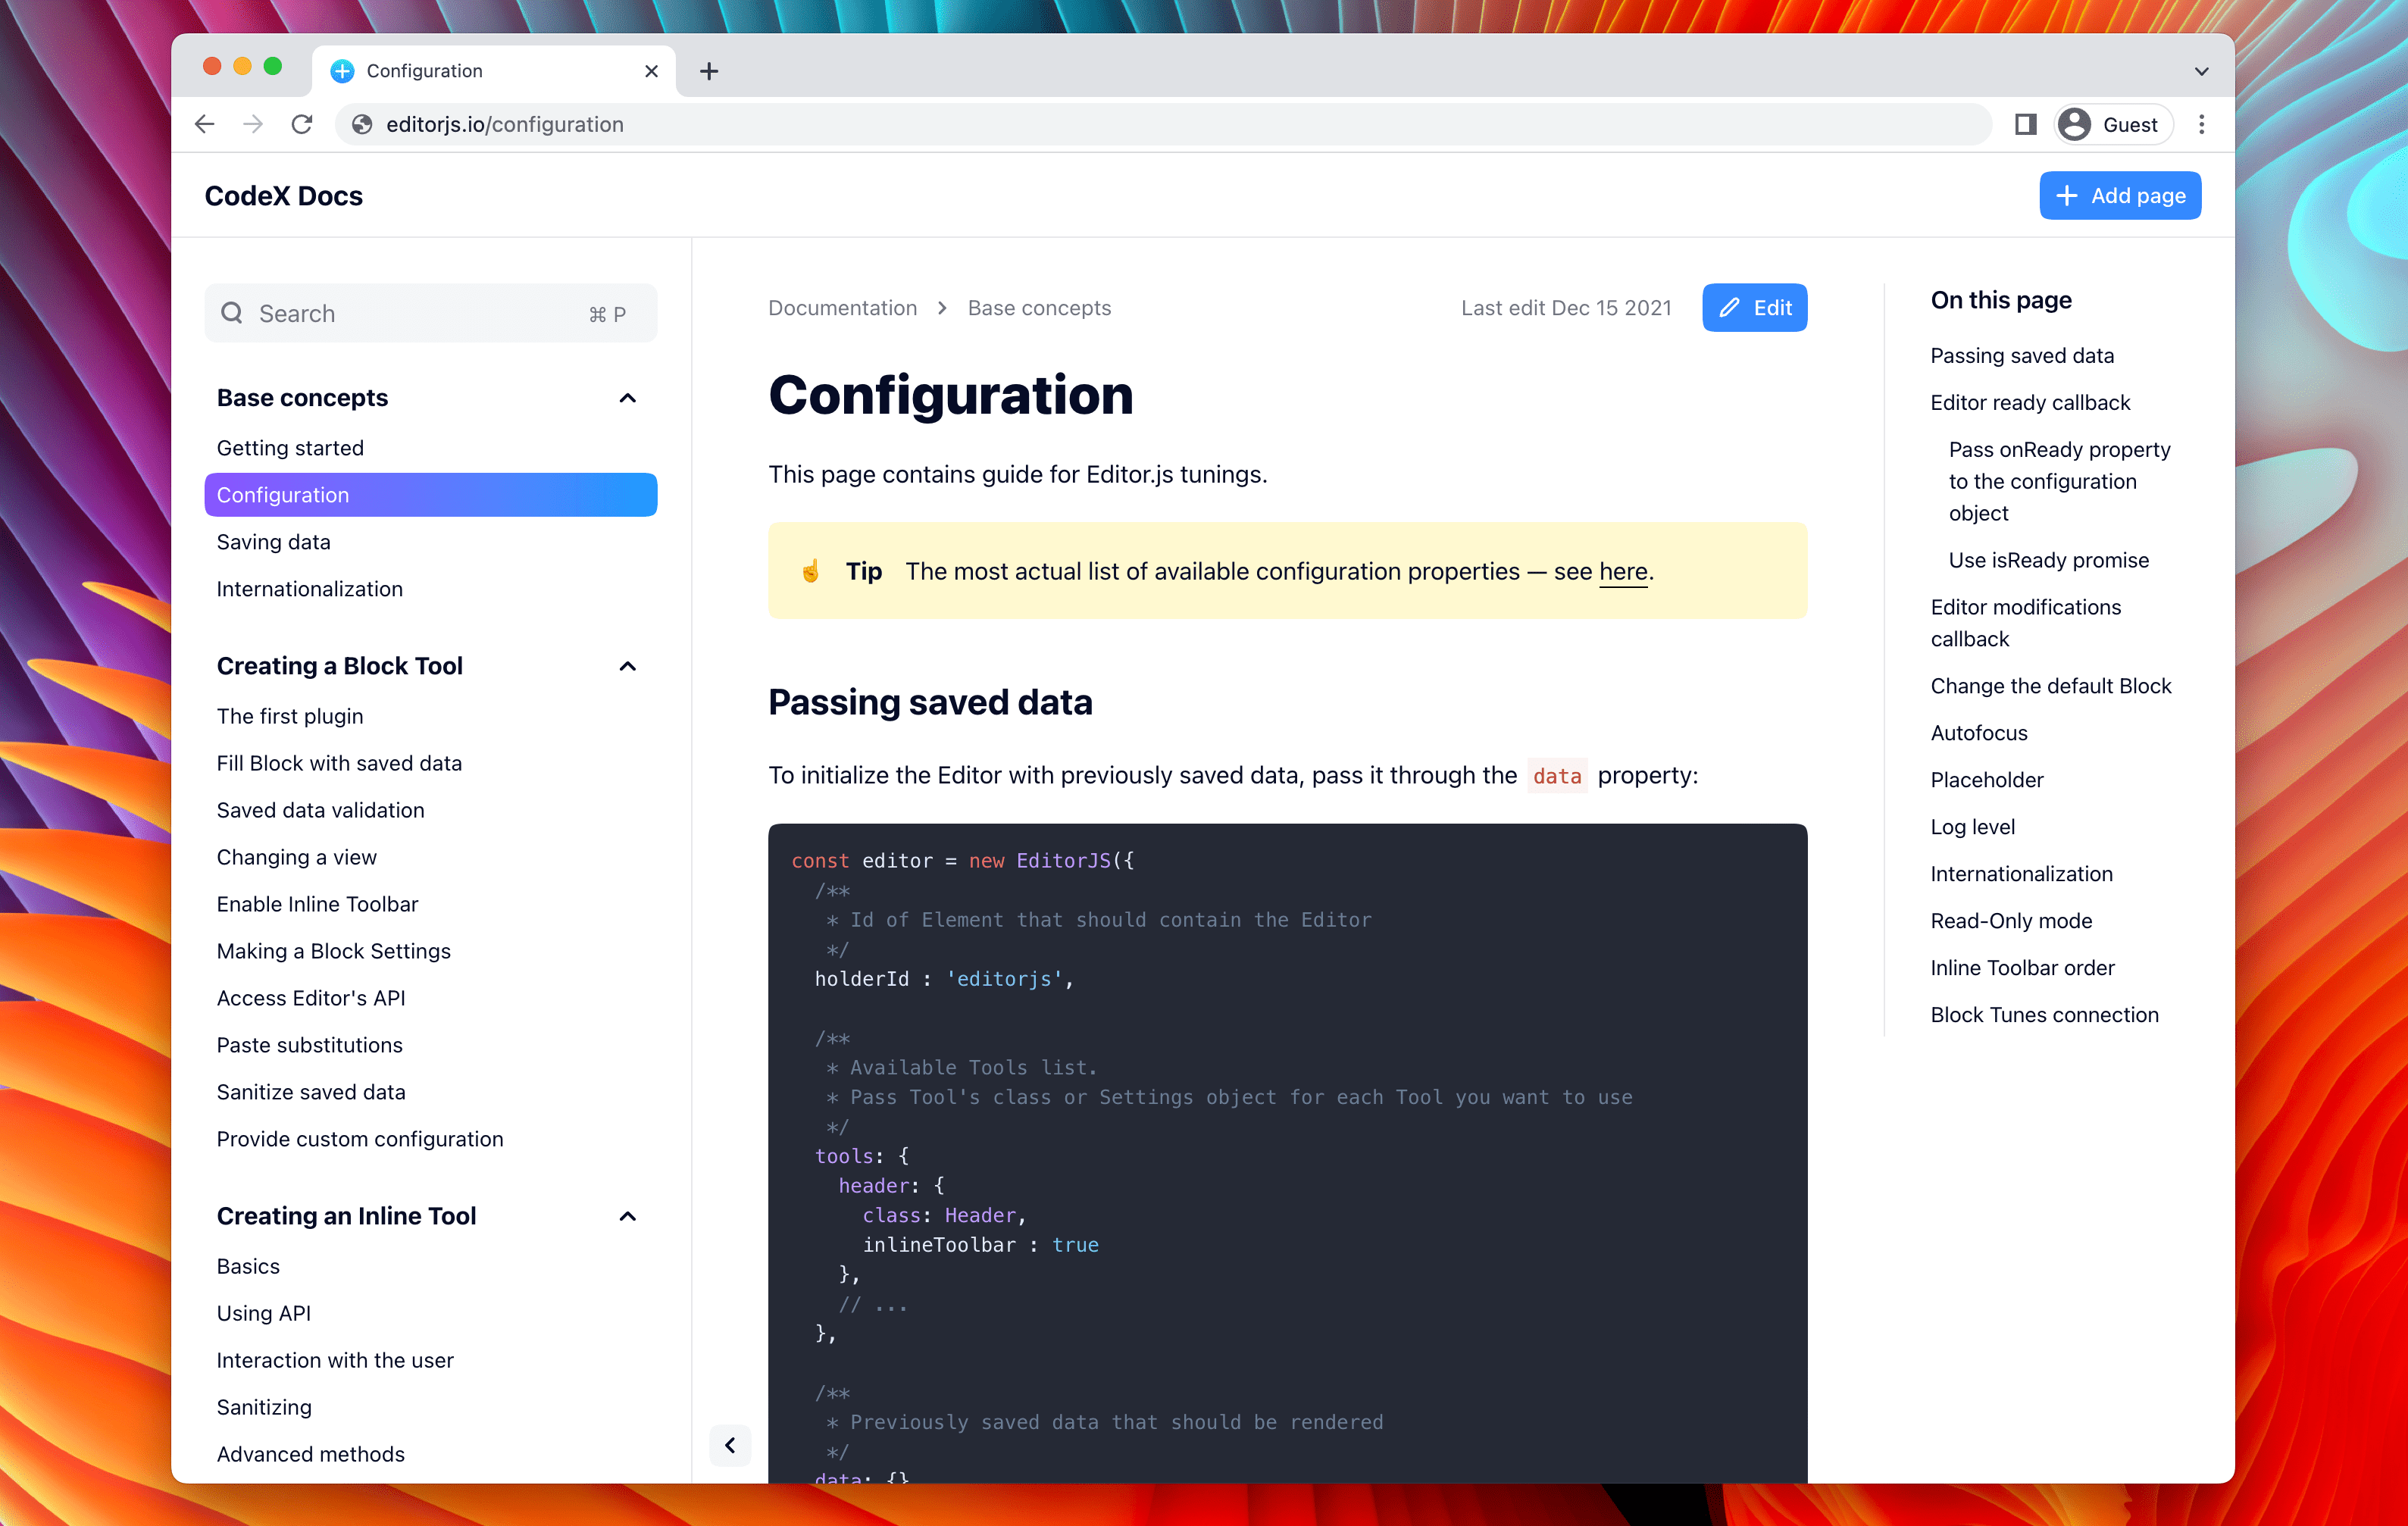
    {
      "Version": "2012-10-17",
      "Statement": [
        {
          "Sid": "AddPerm",
          "Effect": "Allow",
          "Principal": "*",
          "Action": "s3:GetObject",
          "Resource": "arn:aws:s3:::your-bucket-name/*"
        }
      ]
    }

    Then you have to allow Cross Origin Request by editing the CORS Configuration:

    <?xml version="1.0" encoding="UTF-8"?>
    <CORSConfiguration xmlns="http://s3.amazonaws.com/doc/2006-03-01/">
    <CORSRule>
        <AllowedOrigin>your-app-domain.com</AllowedOrigin>
        <AllowedMethod>GET</AllowedMethod>
        <AllowedMethod>PUT</AllowedMethod>
        <AllowedMethod>POST</AllowedMethod>
        <MaxAgeSeconds>3000</MaxAgeSeconds>
        <AllowedHeader>Content-Type</AllowedHeader>
        <AllowedHeader>Authorization</AllowedHeader>
    </CORSRule>
    </CORSConfiguration>

    Installation

    On an existing Kuzzle stack

    Clone this repository in your plugins/available directory and then link it to the plugins/enabled directory.

    Then go to your plugin directory and run the following command npm install.

    For more information, refer to the official documentation: https://docs.kuzzle.io/guide/1/essentials/plugins/#installing-a-plugin

    Local setup

    You can use the docker-composer.yml file provided in this repository to start a Kuzzle stack with this plugin pre-installed.

    You have to provide valid credentials for AWS S3 through the AWS_ACCESS_KEY_ID and AWS_SECRET_ACCESS_KEY environment variables.

    export AWS_ACCESS_KEY_ID=your-access-key
    export AWS_SECRET_ACCESS_KEY=your-secret-key
    
    docker-compose -f docker/docker-compose.yml up

    Then you can open the file test/s3-upload-test.html in your browser.

    kuzzle-plugin-sequence

    Visit original content creator repository
    https://github.com/Aschen/kuzzle-plugin-sequence

  • nopCommerce

    Visit original content creator repository
    https://github.com/cwsheng/nopCommerce